Power Automate Auto StandUp
I’ve been working with PowerAutomate a bit lately to automate some tasks for my team. Some are really simple, reminders to book parking or renew a certificate, others are more complex – monitor all of our Azure AD Service Principals for expiring certs and secrets, then notify the business owners / devs and offer them a self-service renewal. All handy and good learning on the platform.
A friend recently shared a requirement to ask his colleagues for a weekly update, and then to send a summary out on Monday morning for all to read.
The solution I’ve come up with is 3 separate Flow’s;
1. Notify everyone in an AAD group on Friday afternoon to fill out a Microsoft Form.
2. Store all responses to the form in a Sharepoint List.
3. Summarize and email out the results on Monday.
Before you create the flows, let’s create the resources they will reference.
You’ll need;
Microsoft Form with Questions
Sharepoint Site & List
AAD Group with users to target
Pre-requisites
Create a form, you’ll want to think the questions through and get this right first time as if you add a question here, you’ll need to follow all the steps again to ensure it connects with the flow, list & email.
The basics here should be
*you don’t need to store name technically, as we can just use the DisplayName of the logged in user that submitted each form response.
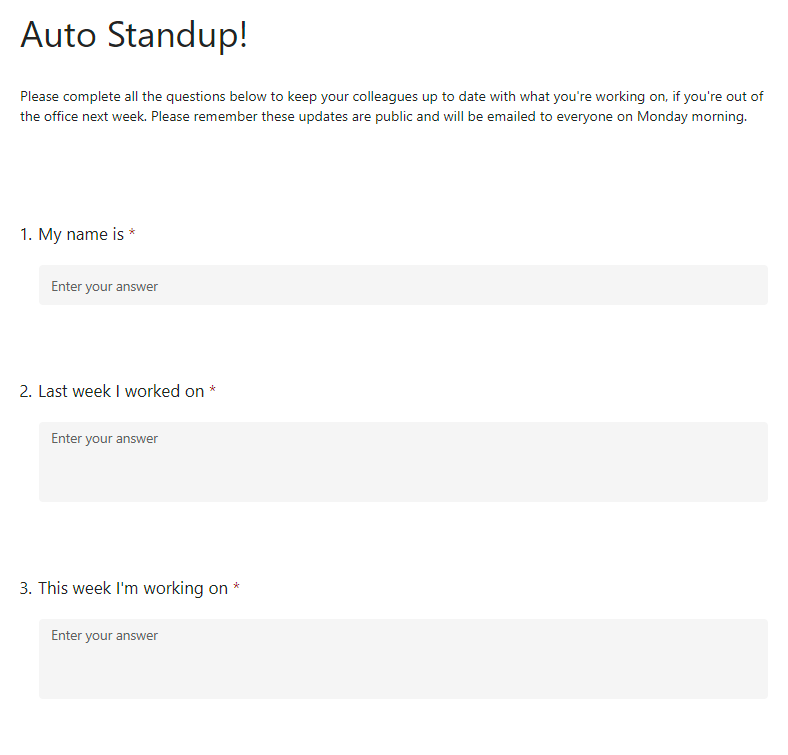
but I am also using
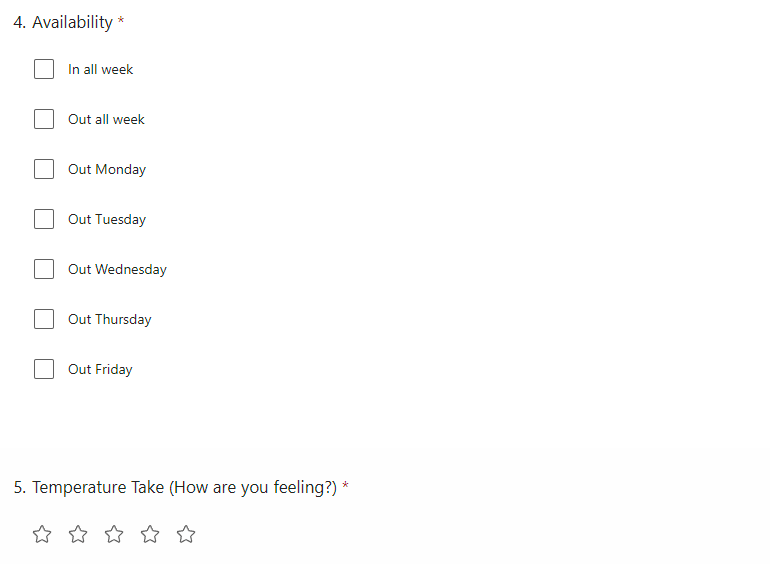
You’ll notice all questions are set as required – this is reduce the chance of data errors in Flow, it expects data and can get upset when a field is empty. Try and make your questions suit this requirement.
If you don’t already have one, create a default empty sharepoint site and then add an empty list. You will want to add a column for every question you have on the form. Each column must match the data type and options it will receive from the form.
For example, the availability question may return multiple answers, ensure the column can receive multiple options and store them correctly.
Goto Azure Active Directory > Groups
Create a new group called something similar to “AAD AutoStandUp”, add yourself as the owner and the first member. Test everything is working with just you first before adding others to the group.
Copy down the objectID for this group.
https://make.powerautomate.com/
Connections required;
PowerAutomate Connections Required
Azure AD Connection
Microsoft Teams Connection
Microsoft Forms Connection
Office 365 Outlook Connection
Flow 1 – Notify
Create a new Scheduled Clow Flow. It should trigger weekly, every week on Friday at 15:00 (or a time to suit you). Click Create.

The first step should be there already, Recurrence. It defines when the flow runs. The next step to add is “Get group members” from Azure AD. When you add this step, paste in the Object ID from the AAD Group you created. The final step here is to add an “Apply to each” block with a “Post message in a chat or channel” block from Teams.
When adding the Teams block you want to act as the Flow Bot, and add Group Members ID as the recipient from the dynamic content block.
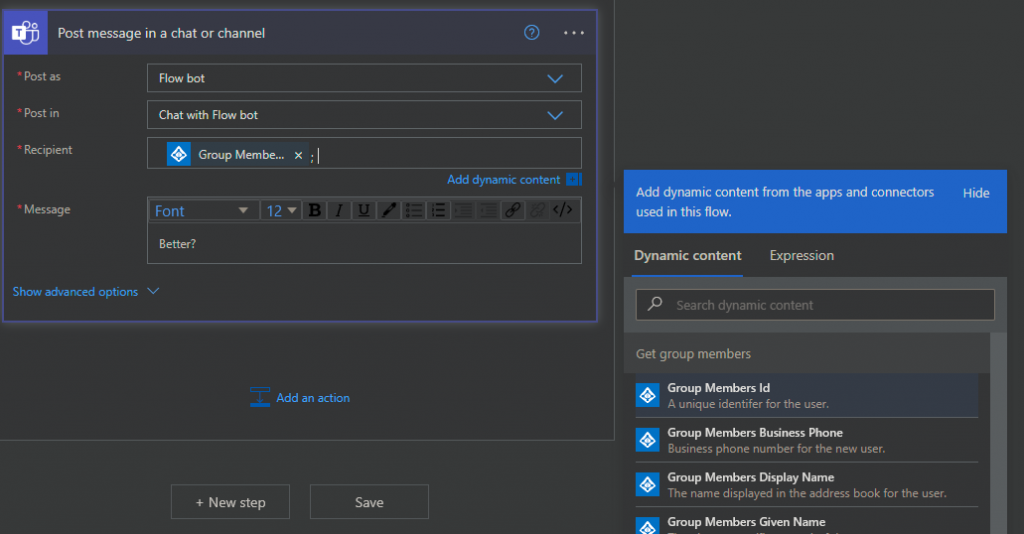
In the message field you’ll want to write a nice message persuading people to head to the MS Forms “Collect Reponses” link.
You could get fancy here and embed the form in teams itself, but its beyond the scope of this project for now.
Flow 2 – Store
We need to collect the responses from Forms as they happen and send them to the List. For this we’ll use an Automated Cloud Flow. Create a new one that is triggered when a new response is received in Forms.
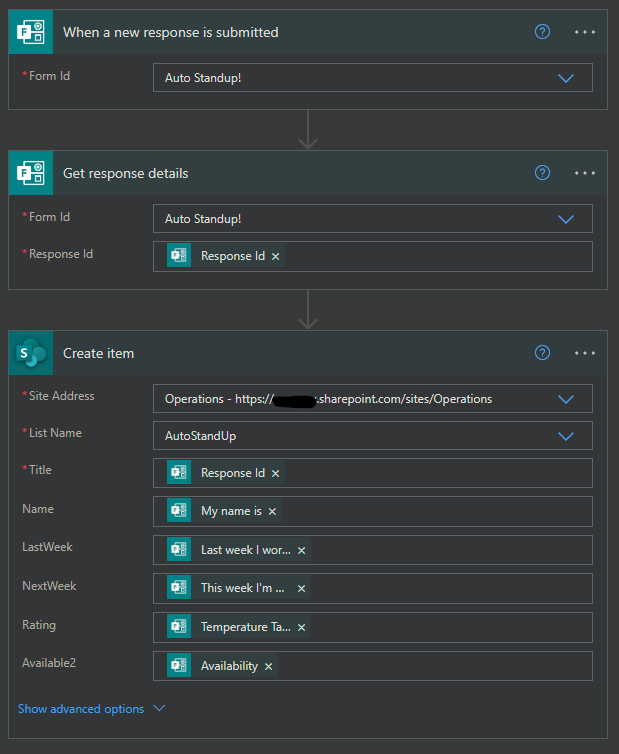
You’ll need to select the form in the first block, then add a “Get response details” block. Select the form you have created and then from the dynamic content block choose Response Id.
Finally add a “Create item” block from Sharepoint and configure it as above. This is the mapping between the form and the list. If you don’t have all questions on the form set to required, and one field is blank this flow may fail due to this step.
Flow 3 – Summary Email
Create a scheduled flow to run every Monday morning at 8.30am.
Add a Sharepoint “Get Items” block and for now just connect it to the site address and list name. We’ll come back and limit the amount of entries it returns later on using a filter query.

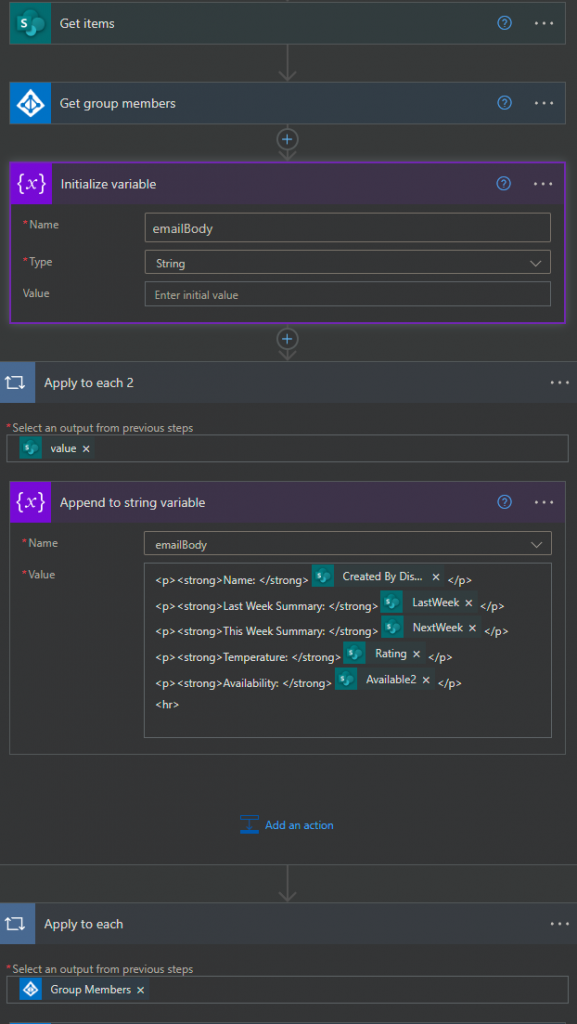
Next add a “Get group members” block from Azure AD and add in the AAD Group object ID as before. Then add a “Create HTML table” and select value from the dynamic content block.
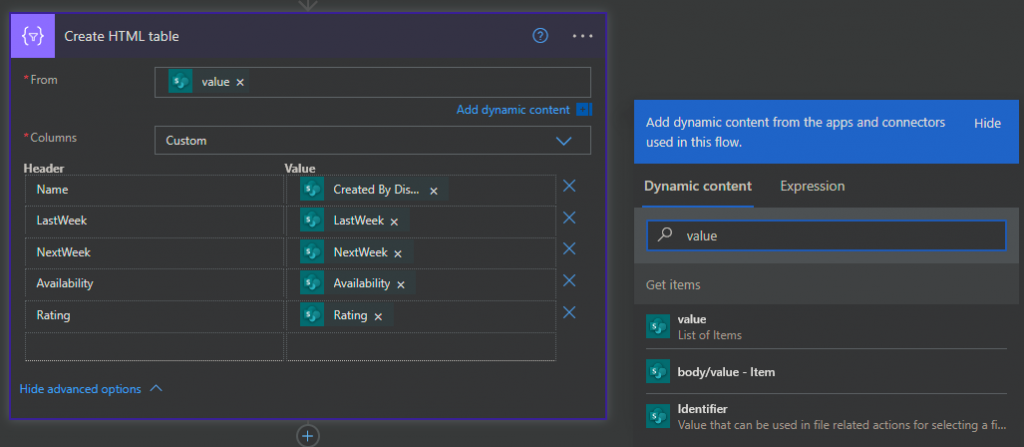
For columns, select Custom, then give a title or heading and select the value from the dynamic content.
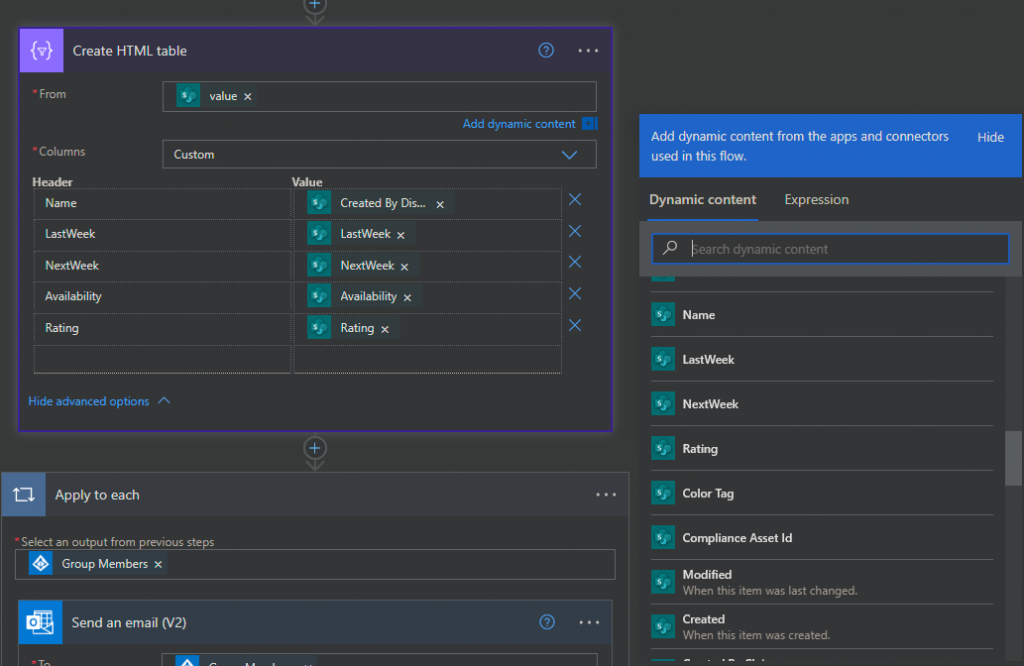
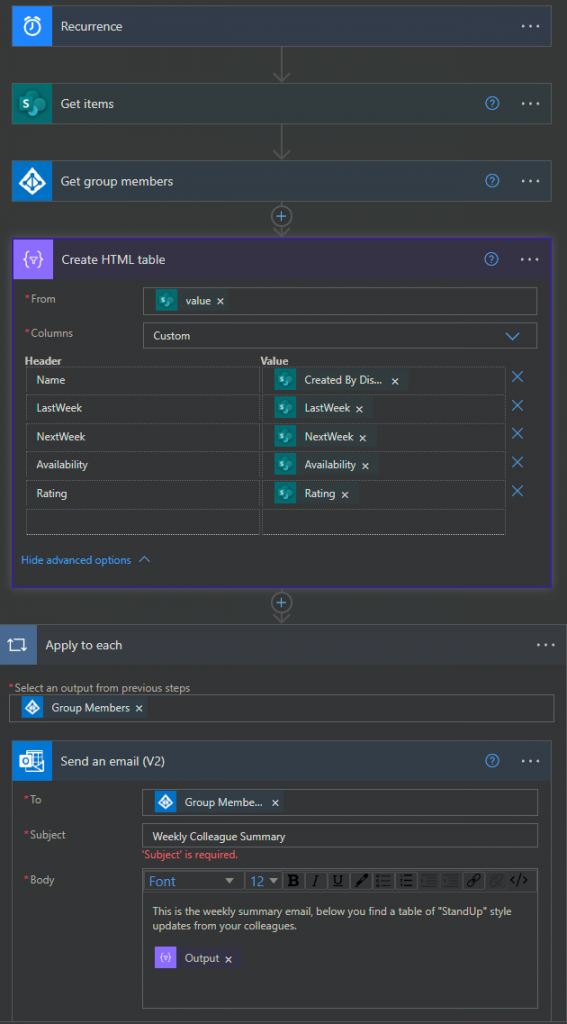
Finally, add in the “Send an Email” block and use Group Members ID as the recipient and the HTML Output within the email.
Be sure to flesh out the email a bit 🙂
As it stands, this will send out the whole list every week. You have two options – either nuke the list every Monday after sending or filter the results. This query should work for you;
Created ge '@{formatDateTime(addDays(utcNow(),-5),'yyyy-MM-dd')}T00:00:00Z'
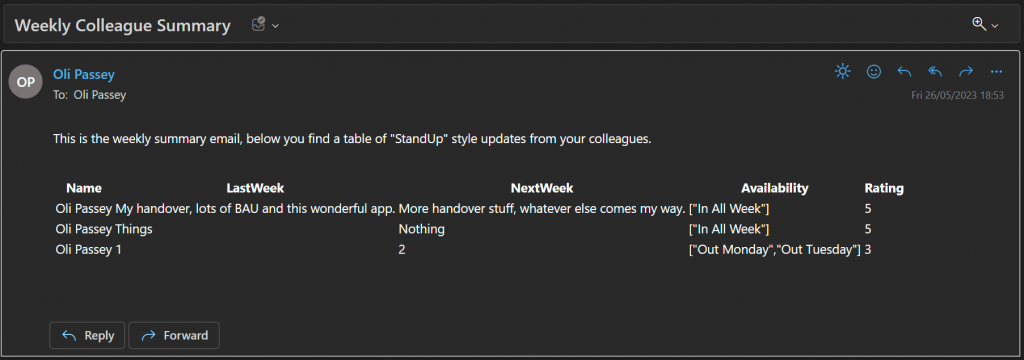
Alternate E-Mail Format
So, the above email is pretty raw and depending how you’ll use it and which questions you’ll ask, a table doesn’t really help. Edit your third flow to this for a slightly better format.
This gives you;
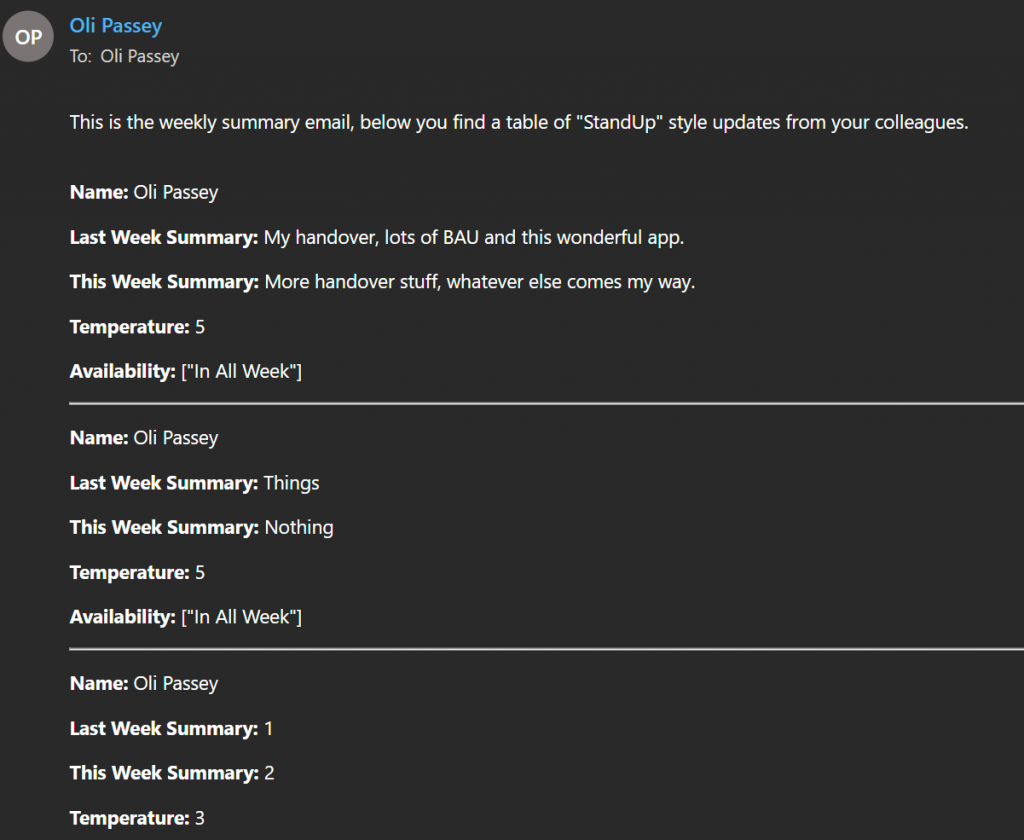
Which you may find easier to embed within your branding.
*Update – 6/6/23 – Adding announcements section, and some nicer formatting.
I had to keep tweaking…
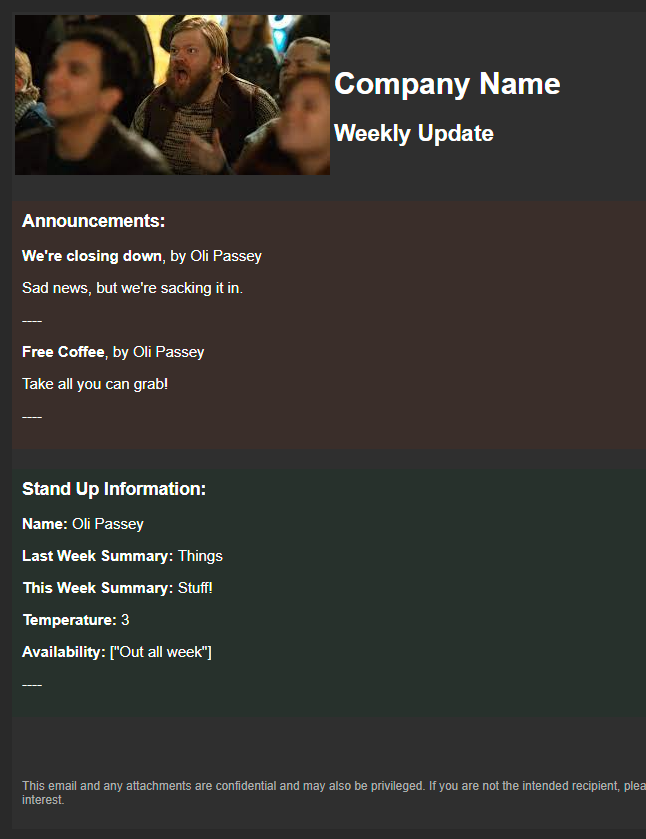
The colour choice is pretty horrendous (thanks auto dark-mode) but in light mode the sections have pastel coloured backgrounds, space for corporate logo and title at the top, and the generic useless disclaimer at the bottom. To achieve this, its another SP List for the announcements, and some HTML for the final e-mail. The html is here
Final Word
I’d love nothing more than to package this up into a zip file that you could import in one-click, but due to the flow accessing specific resources (Sharepoint, Forms) the import would fail on your side.
Microsoft aim to solve this platform limitation in the next 6 months, if that happens (and I notice) I’ll republish this.